React Native app with simple steps
Love to create React Native app
React Native is very demanding language to develop mobile app for both Android and iOS. This has "Learn Once and Write Anywhere". React Native combines the best parts of native development with React, a best-in-class JavaScript library for building user interfaces.
Create a whole app from scratch:
TOY PROJECT TEST (REACT NATIVE)
This is a ToyProject test application from scratch and it is created in React Native for android and iOS for learning to start. Some people face problem to set up and start application, might this will help to all learner.
To create project from terminal
Deepaks-Air:ReactNative dsharma$ npx react-native init ToyProject
Run instructions for iOS:
- cd "/Users/dsharma/ReactNative/ToyProject" && npx react-native run-ios
or
- Open ToyProject/ios/ToyProject.xcworkspace in Xcode or run "xed -b ios"
Hit the Run button
Run instructions for Android:
• Have an Android emulator running first or a device connected.
• cd "/Users/dsharma/ReactNative/ToyProject" && npx react-native run-android
For iOS - Deepaks-Air:ReactNative dsharma$ npx react-native run-ios
For Android - Deepaks-Air:ReactNative dsharma$ npx react-native run-android
Current version:
Deepaks-Air:ToyProject dsharma$ react-native -version
react-native-cli: 2.0.1
react-native: 0.61.5
Deepaks-Air:ToyProject dsharma$ node --version
v13.1.0
Dependency Used:
npm i react-native-paper
npm i react-native-splash-screen
npm i react-navigation
npm i react-navigation-stack
npm i react-native-vector-icons
npm i react-native-gesture-handler
npm i react-native-safe-area-context
npm i native-base
npm i react-native-status-bar-height
npm i react-native-screens
npm i @react-native-community/masked-view
npm i @react-native-community/netinfo
npm i react-navigation-tabs
npm i react-native-reanimated
npm i react-native-axios
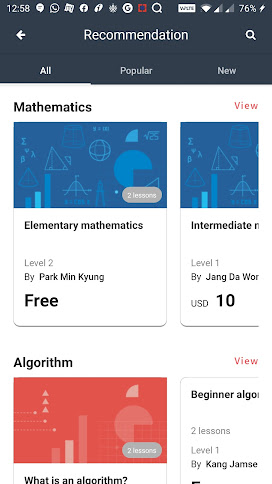
Preview on UI:
Sometimes we need to reset caching so can use this command:
Deepaks-MacBook-Air:ToyProject dsharma$ npm start -- --reset-cache
Migrating to Android App Bundle (aab)
If you’d followed React Native’s official guide about publishing your app to Google Play Store you are likely creating an APK file using the following command:
./gradlew assembleRelease
The above command would output the APK file under android/app/build.outputs/apk/release/app-release.apk which you’d then submit to Google Play Store. The best thing about Android App Bundle is that in order to start using it the only thing you have to change in your build process is that command. Instead of using` assembleRelease` you should now run:
./gradlew bundleRelease
Now instead of an APK file being generated we will get a new file with an extension .aab located under android/app/build/outputs/bundle/release/app.aab— this is the file you want to submit to Google Play (either manually or using Google Play API). Here is more or less what you should expect when publishing an update using Android App Bundle on top of an old app that’s been submitted as a single APK
Github Repository for reference:
https://github.com/dkhandal/ToyProject
Note: This is not the complete project but can get idea about to set and start.Enjoy!!!
If you like(👍) this please vote and comment.
If you want how to make keystore key for Google Play to publish in simple steps then follow link: How to make key store


hi
ReplyDeleteHi @Unknow if you really like then please vote.
DeleteGreat article! good to kick start
ReplyDeleteGrea
ReplyDeleteGreat
ReplyDeleteGreat job
ReplyDelete